

Falkreath Hold is a 4-player group dungeon located in Craglorn in The Elder Scrolls Online. It is part of the Horns of the Reach DLC. It features Normal and Veteran Modes.
Falkreath Hold Veteran Walkthrough & Strategies
This is a challenging dungeon in Veteran modes. Players should form a well-geared party at endgame level.
"Falkreath is under siege, and it soon will fall to the Minotaurs and their Reachmen allies. Falkreath Hold, one of the two new dungeons found in the Horns of the Reach DLC game pack, pits you and your team against the hordes of the Dreadhorn Clan in a desperate attempt to save the city. Want the inside scoop on this new four-player challenge (including information on the armor sets, monster mask, and other unique rewards)? Check out our preview below."
Suggested group composition for Falkreath Hold
- 1 Tank
- 1 Dedicated Healer
- 2 Ranged DPS
Keep in mind
- Dreadhorn Wallbreakers are minotaurs with large greataxes, tanks must get aggro on them as they can one-shot party members
- Falkreath Hold has lots of mobs and lots of AOE damage, healers must be on point with AOE heals, and tanks ready to get aggro on multiple mobs. DPS members should bring AOE DPS to survive the dungeon.
Morrigh Bullblood
Level: Max
HP:
Strategy:
This is a simple boss with adds from set of humanoid enemies, and a minotaur wallbreaker. When the tank has aggro, it's a rather straight-forward "tank and spank" affair. Besides watching out for the possible stun from her AOE, proceed as with any mob.
At 50% health, the boss casts a shield above herself and anyone caught outside it will take massive damage. Simply make sure to get inside to stay safe.
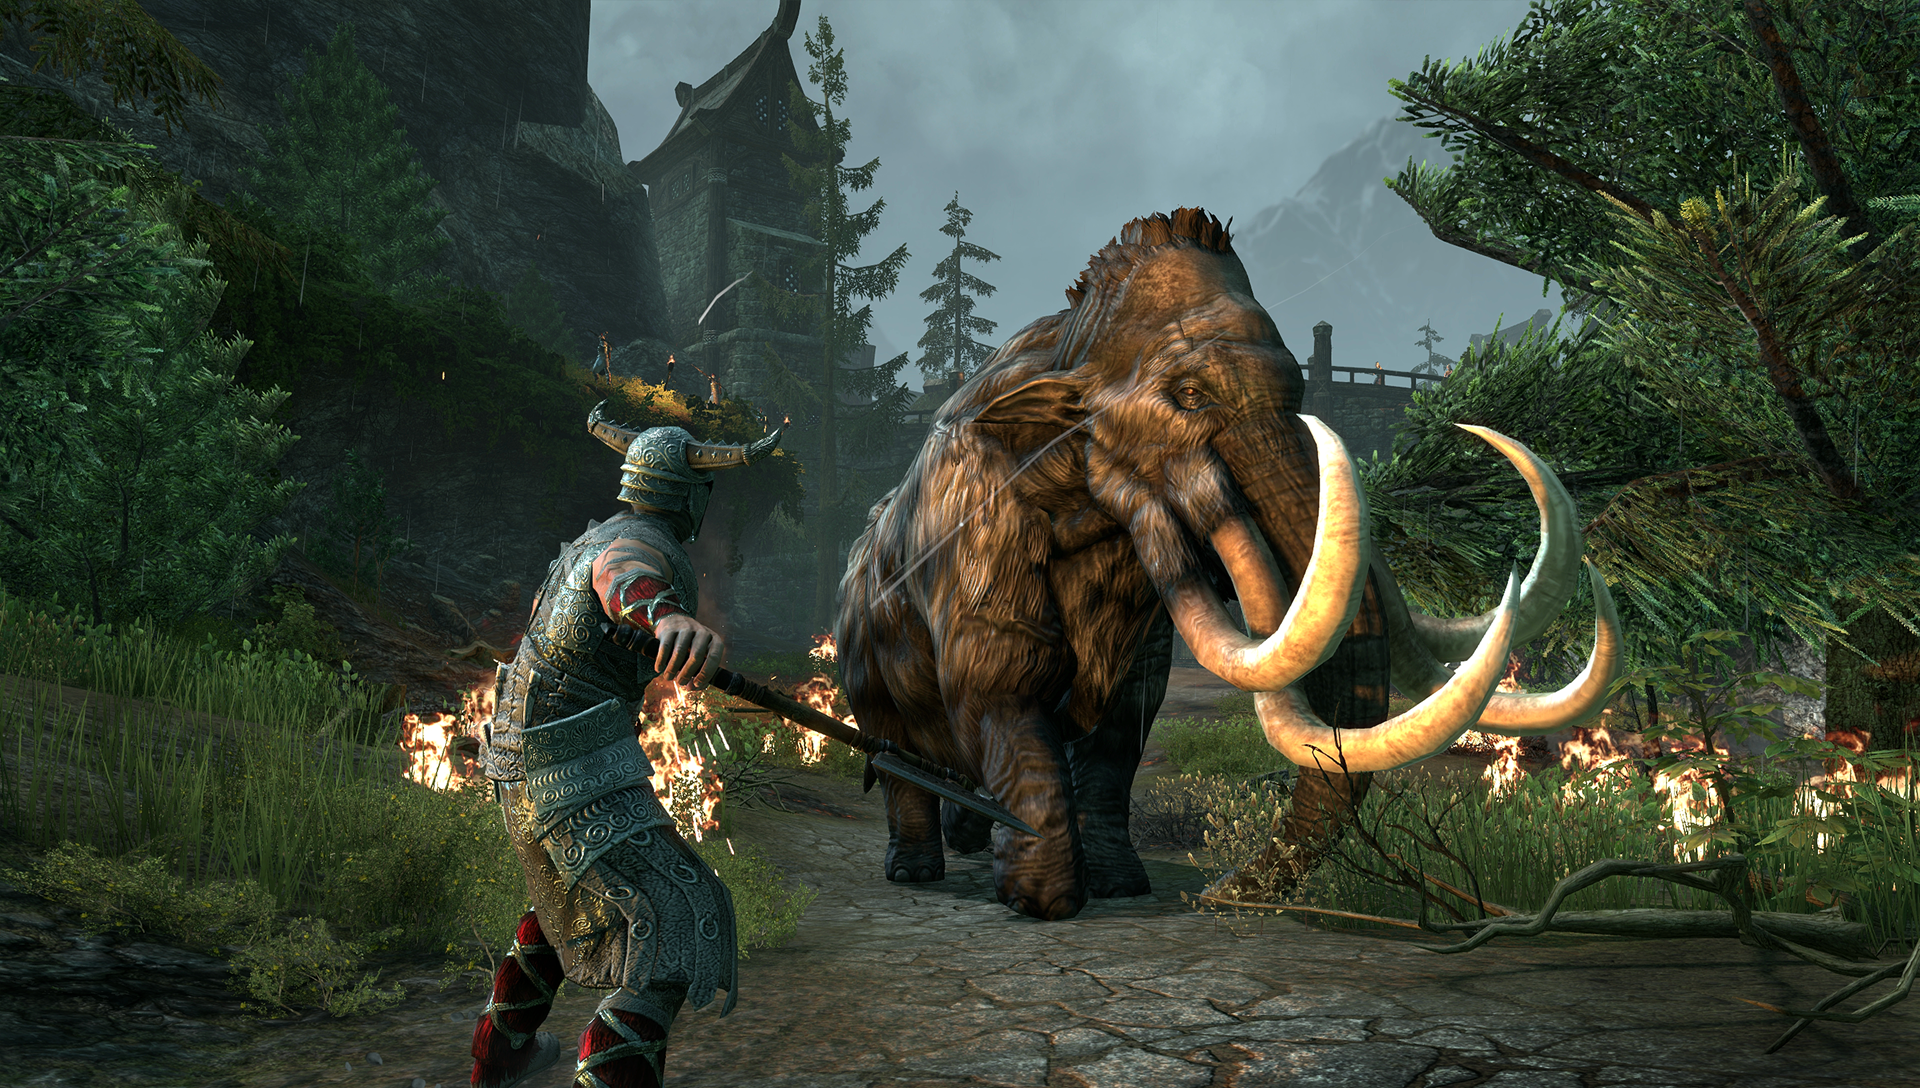
Siege Mammoth
Level: Max
HP:
Strategy:
This boss is also simple, but ramps out the damage output. Deadly to DPS in your party - make sure the tank grabs aggro and faces the mammoth away from the party. The tank will have to shield, block and dodge the massive frontal AOE or put undue pressure on the healer.
For the DPS, staying at range is the best option. You'll have to dodge around projectiles that land on the arena throughout the fight.
At around 50% health, the boss will begin a massive AOE attack that must be rolled through to avoid. Healers should be ready for this with buffs, HOTs and possibly soul gems.
Cernunnon
Level: MAX
HP:
Strategy:
This boss is more challenging than the others, with special mechanics to boot.
Mechanics:
- There are three enemies before Cernunnon, with varying attacks and deadliness: Erbogan, Tuecille and Mokveda.
- There is a protected area - if you exit it you take damage and die (clue: "The Vortex Tugs at Your Soul")
- When you deplete a mini-boss HP, they drop their soul and you must take it to a nearby circle to seal it or they get up again
- The bosses are re-summoned during the phases of Cernunnon
- There are ghosts floating about and they fear you outside the circle
- The boss puts an AOE on each player. Don't stack up and block and shield to minimize the damage
Tank: Take aggro on all bosses and get ready to block as their heavy attacks are really damaging. Have an interrupt at the ready to stop Erbogan summoning flame pillars that will likely kill a member of your group. Make sure to keep an eye on your positioning to avoid AOEs and to take on Cernunnon when he spawns.
DPS: Kill order is: Erbogar, then Tuecille, then Mokveda. Focus on removing each one individually rather than by AOEs. When you defeat one of the three, they drop an element to pick up that will damage and slow you as you take it to the nearby altar - LET THE TANK DO THIS. Cernunnon will re-summon his adds after taking damage, the mechanics and kill order remain the same
Healer: The tank will be taking most of your heals (hopefully) so be ready with strong ones. When an add is about to go down, the DPS will need heals in order to get the orbs to the altars for sealing - so keep near them and be alert and in communication via voice.
Deathlord Bjarfrud Skjoralmor
Level: MAX
HP:
Strategy:
This boss looks easy at first, but can become a DPS race if players aren't prepared to manage the increasing AOEs.
Mechanics:
- Draugr enemies mob the party near the boss and afflict and area
- All players will be affected by a DOT that becomes increasingly nasty as the fight goes on and corpses pile up
- A red circle filling up is your clue you need to cleanse all corspes in the area
- Cleanse the DOT by using the glowing urns: all members should interact with the urn then return to the middle and use its cleansing effect to rid the party of the nasty DOT
Tank: Take aggro on the boss and the draugr if you can. This is a straight forward fight. You should get all wights and boss in a central area if possible
DPS: One DPS should be assigned to cleansing the DOT with the urns and supporting with AOE damage. Killing all wights near each other is best The other DPS can simply focus on the boss to burn as fast as possible - the least adds he kills the faster this will go
Healer: The tank won't take much damage so AOE heals are the way to go. Help cleanse the area of corpses by using the urn. You can also support your party with rapid maneuver to assist the DPS in getting to the urns for cleansing.
Domihaus the Bloody-Horned
Level: Max
HP:
Strategy:
This boss is not only heavy-hitting, but complex in mechanics and group coordination. Second only in challenge to the Bloodroot Forge.
Mechanics:
- Pounding: AOE fire balls on all directions to all party members at a 360 angle. Can be blocked by the pillars
- Melee Fire AOE: 360 degree deadly slow+fire AOE around the boss
- Ranged Fire AOE: 360 degree deadly fire on the outer area of the pillars
- Add summoning: Summons four Atronachs and becomes invincible (reflects damage too!)
- Frontal AOE: A nasty and heavy-hitting aoe that the tank must block
- Pull: Domihaus pulls all characters to himself, slows them, and makes pools of deadly fire spikes spawn under them. Walk backwards SLOWLY to avoid them and not get them on your friends
- "GROVEL" shout: At specific health thresholds of 70%, 50%, 30%, 10% and 5%, the boss will execute a one-hit-kill shout. Players must run behind the pillars to hide, but there are limited pillars and they will break. The party must therefore stick together to use only one pillar per shout.
Positioning: The party will attempt to position itself in each cardinal direction during regular DPS in order to avoid being "Stacked" by the "pull" mechanic. When it's time for the "Grovel" shout - everyone should get together with the tank to his chosen pillar
Kill Order: When the adds spawn, they are priority. Save your ultimates to use on the adds if they are still alive when the boss wakes up. After 20% health, the adds are no longer important - focus on execute!
Handling a death: Deaths are completely recoverable up to 20%. When someone dies, kill the adds and secure a rotation first, then revive your teammate from a safe position only when you know fire isn't about to spawn under you. The downed party member should ALWAYS wait for it to be safe before reviving.
Tank: Take aggro on the boss and point it away from the party - make sure to keep shielding and blocking often as the heavy attacks are very deadly. When the adds spawn, gather them at the boss (A dragonknight who can pull in the flame atronach is ideal). In the last 20% of the fight, the party will begin to be overwhelmend by adds. Have an ultimate ready to assist with DPS.
DPS: Build up your ultimate so that you can dispatch of the adds when they come, and coordinate with your fellow DPS so you don't waste them. The boss does not leave the middle of the arena, but you will have to constantly call out the "go in, go out" of avoiding the deadly fire. For the adds, focus on killing the stone atronach first as they are the worst, and equip succifient AOE to defeat many enemies at once with your group. Coordinating the ultimates will be vital in execution mode, as the party will try to kill the boss quickly without focusing on the adds, which will keep spawning eternally.
Healer: This can be a challenging fight to heal, as you will need AOE heals and individual heals for the tank. To make things better, it's advisable to have both War Horn and Meteor equipped, so you can help drop an ultimate on a group of adds if one of your DPS isn't ready.
Execution mode tip: When you reach 20%, the boss will get a shield, and speed up atronach summons without becoming stone. Time your ultimates so that you can AOE the shield and the adds in the middle. It's important to not lose your cool here, as you'll have fire walls + pounding + adds.
Trivia
- Dungeon Gallery

Falkreath Hold Information
- Location: Craglorn
- Suggested Level: Max
- Final Boss: Domihaus the Bloody-Horned
Achievements
Quests
- Falkreath's Demise
- Falkreath Hold Pledge
Falkreath Hold Map


Bosses
- Morrigh Bullblood
- Siege Mammoth
- Cernunnon
- Deathlord Bjarfrud Skjoralmor
- Domihaus the Bloody-Horned
Set Drop
NPCs in the area
Notable Items
- Chests
- Heavy Sacks
- Lorebooks
Enemies
- Dreadhorn Firebrand
- Dreadhorn Scrapper
- Dreadhorn Town-Razer
- Dreadhorn Wildtamer
- Draugr Thralls
- Dreadhorn Earthbinders
- Dreadhorn Trampler
- Dreadhorn Wallbreaker